Xamarin:PCLに埋め込みリソースとしてテキストなどのファイルを配置し、そのファイルを読み込む
PCLプロジェクトに「埋め込みリソース」としてファイルを配置し、そのファイルを読み込む例を記載します。 今回の例はxmlファイルですが、テキストでも同様の方法で読み込めます。
下記の配置のファイルを読み込む例です。

//typeofの引数には、このメソッドが実装されているクラスを指定してください
var assembly = typeof(MainPageViewModel).GetTypeInfo().Assembly;
using (Stream stream = assembly.GetManifestResourceStream("FlashCard.Data.initialData.xml"))
using (StreamReader reader = new StreamReader(stream))
{
    //下記例は両方実行しようとするとエラーになるため、文字列かxmlどちらかのみ実行してください。

    //文字列として読み込む例
    string str = await reader.ReadToEndAsync();
    //xmlをデシリアライズする例
    System.Xml.Serialization.XmlSerializer serializer =
        new System.Xml.Serialization.XmlSerializer(typeof(FlashCardList));
    var list = serializer.Deserialize(reader) as FlashCardList;
}
MVVM:とにかく適当なICommandを実装したい時のサンプル
サンプルプログラム作成時、INotifyPropertyChangedを手書きで実装したViewModelは作ったけれど、
「ICommandも実装しなきゃいけないの忘れてた!今からnugetでMVVM用ライブラリ落としてくるのも面倒くさいし…」
みたいな時の為の、しょうもないサンプルです。
public class RelayCommand : ICommand
{
    //Command実行時に実行するアクション、引数を受け取りたい場合はこのActionをAction<object>などにする
    private Action _action;

    public RelayCommand(Action action)
    {//コンストラクタでActionを登録
        _action = action;
    }

    #region ICommandインターフェースの必須実装

    public event EventHandler CanExecuteChanged;

    public bool CanExecute(object parameter)
    {//とりあえずActionがあれば実行可能
        return _action != null;
    }

    public void Execute(object parameter)
    {//今回は引数を使わずActionを実行
        _action?.Invoke();
    }

    #endregion
}
私個人は上記実装を非常によく使います。
こんな感じで利用してください。
View
<Window x:Class="WpfApplication.MainWindow" … >
    <Window.DataContext>
        <local:ViewModel/>
    </Window.DataContext>
    <Grid>
        <Button Content="Test" Command="{Binding MyCommand}"
                HorizontalAlignment="Center" VerticalAlignment="Center"/>
    </Grid>
</Window>
ViewModel
public class ViewModel : INotifyPropertyChanged
{
…
    private RelayCommand _myCommand;

    /// <summary>
    /// Gets the MyCommand.
    /// </summary>
    public RelayCommand MyCommand
    {
        get
        {
            return _myCommand
                ?? (_myCommand = new RelayCommand(
                () =>
                {
                    MessageBox.Show("clicked!");
                }));
        }
    }
}
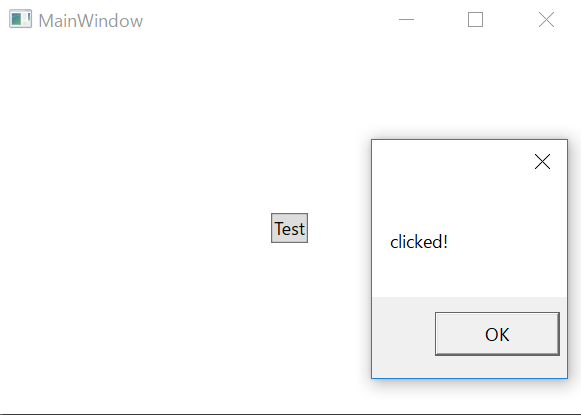
実行するとこんな感じです。
WPF:DataGridヘッダーのクリック時にViewModel側のICommandを実行するための添付プロパティ
上記リンクでBlendのオブジェクトの拡張を作成してTriggerをStyle内に記述する方法での解決があります。 汎用性があるものの、多くのxamlを書く必要があるため、添付プロパティでの解決方法も一応記載してみようと思いました。
<Window x:Class="WpfApplication.MainWindow"
        xmlns="http://schemas.microsoft.com/winfx/2006/xaml/presentation"
        xmlns:x="http://schemas.microsoft.com/winfx/2006/xaml"
        xmlns:d="http://schemas.microsoft.com/expression/blend/2008"
        xmlns:mc="http://schemas.openxmlformats.org/markup-compatibility/2006"
        xmlns:local="clr-namespace:WpfApplication"
        mc:Ignorable="d"
        Title="MainWindow" Height="350" Width="525">
    <Window.DataContext>
        <local:MainViewModel/>
    </Window.DataContext>
    <Grid>
        <DataGrid ItemsSource="{Binding Items}" />
    </Grid>
</Window>
Windowはこんな感じで、
namespace WpfApplication
{
    public class MainViewModel
    {
        public List<object> Items { get; } = new List<object>() { new { Item1 = 1, Item2 = "山田" }, new { Item1 = 2, Item2 = "田中" } };
    }
}
DataContextに入れるVMはこんな感じで。

この画面に、ヘッダークリックイベントを付けていきます。
namespace WpfApplication
{
    public class Attached
    {
        public static ICommand GetColumnHeaderClickCommand(DependencyObject obj)
        {
            return (ICommand)obj.GetValue(ColumnHeaderClickCommandProperty);
        }

        public static void SetColumnHeaderClickCommand(DependencyObject obj, ICommand value)
        {
            obj.SetValue(ColumnHeaderClickCommandProperty, value);
        }

        // Using a DependencyProperty as the backing store for ColumnHeaderClickCommand.  This enables animation, styling, binding, etc...
        public static readonly DependencyProperty ColumnHeaderClickCommandProperty =
            DependencyProperty.RegisterAttached("ColumnHeaderClickCommand", typeof(ICommand), typeof(Attached), new PropertyMetadata(null, PropertyChanged));

        private static void PropertyChanged(DependencyObject d, DependencyPropertyChangedEventArgs e)
        {
            var grid = d as DataGrid;
            grid.Loaded -= Grid_Loaded;
            if (e.NewValue != null)
                grid.Loaded += Grid_Loaded;
        }

        private static void Grid_Loaded(object sender, RoutedEventArgs e)
        {
            var grid = sender as DataGrid;
            grid.FindChildren<DataGridColumnHeader>().ToList().ForEach(col => col.Click += Col_Click);
        }

        private static void Col_Click(object sender, RoutedEventArgs e)
        {
            var header = sender as DataGridColumnHeader;
            var grid = header.FindParent<DataGrid>();
            GetColumnHeaderClickCommand(grid)?.Execute(null);
        }

    }

    public static class Extensions
    {
        public static T FindParent<T>(this DependencyObject child) where T : DependencyObject
        {
            DependencyObject parentObject = VisualTreeHelper.GetParent(child);
            if (parentObject == null) return null;
            T parent = parentObject as T;
            return parent != null ? parent : FindParent<T>(parentObject);
        }

        public static List<T> FindChildren<T>(this DependencyObject parent, List<T> children = null)
            where T : DependencyObject
        {
            if (children == null)
                children = new List<T>();

            if (parent != null)
            {
                int childrenCount = VisualTreeHelper.GetChildrenCount(parent);
                for (int i = 0; i < childrenCount; i++)
                {
                    var child = VisualTreeHelper.GetChild(parent, i);
                    var typeChild = child as T;
                    if (typeChild != null)
                    {
                        children.Add(typeChild);
                    }
                    children = FindChildren<T>(child, children);
                }
            }
            return children;
        }

    }

}
上記のクラスを作成し、
<Window …>
…
    <Grid>
        <DataGrid ItemsSource="{Binding Items}" local:Attached.ColumnHeaderClickCommand="{Binding HeaderClickCommand}"/>
    </Grid>
</Window>
上記のように添付プロパティをDataGridに追加し、
namespace WpfApplication
{
    public class MainViewModel
    {
…
        private RelayCommand _headerClickCommand;

        /// <summary>
        /// Gets the HeaderClickCommand.
        /// </summary>
        public RelayCommand HeaderClickCommand
        {
            get
            {
                return _headerClickCommand
                    ?? (_headerClickCommand = new RelayCommand(
                                          () =>
                                          {
                                              MessageBox.Show("header clicked");
                                          }));
            }
        }

    }
}
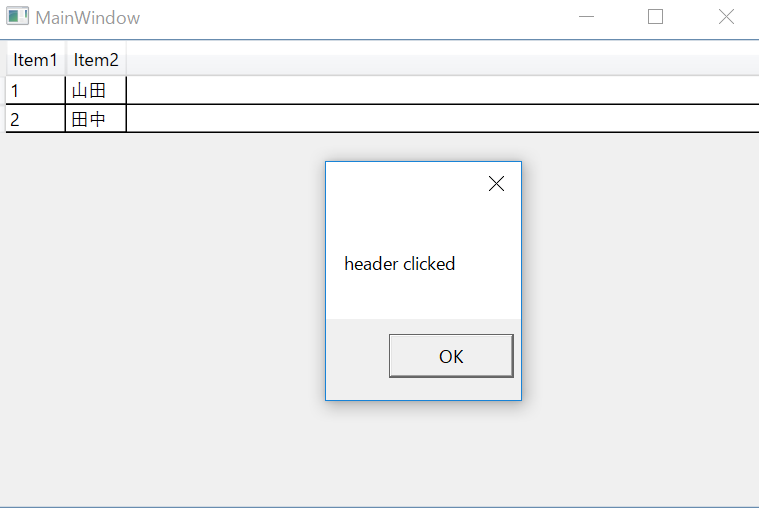
ViewModelに上記実装を加えると、クリック時にメッセージボックスが出るようになります。
xamlの変更は少ないのですが、添付プロパティがそこそこの大きさになってしまいました…
WPF:DataGridの列ヘッダークリックによるソートを「昇順」→「降順」→「ソート無し」の繰り返しにカスタム
WPFのデータグリッドの標準的な列ヘッダークリックソートの動きは「昇順」→「降順」→「昇順」…の繰り返しなのですが、 これを「昇順」→「降順」→「ソート無し(データソースの並び順)」→「昇順」…の繰り返しに変更します。
DataGrid向けの添付プロパティを用意します。
using System.ComponentModel;
using System.Windows;
using System.Windows.Controls;
using System.Windows.Data;

namespace DataGridSort
{
    public class Attached
    {
        public static bool GetIsSortCustomize(DependencyObject obj)
        {
            return (bool)obj.GetValue(IsSortCustomizeProperty);
        }

        public static void SetIsSortCustomize(DependencyObject obj, bool value)
        {
            obj.SetValue(IsSortCustomizeProperty, value);
        }

        //Trueに設定した場合、ソートを昇順、降順、なしの順で行われるカスタムが施される
        public static readonly DependencyProperty IsSortCustomizeProperty =
            DependencyProperty.RegisterAttached("IsSortCustomize", typeof(bool), typeof(Attached), new PropertyMetadata(OnIsSortCustomizeChanged));

        private static void OnIsSortCustomizeChanged(DependencyObject d, DependencyPropertyChangedEventArgs e)
        {
            var datagrid = d as DataGrid;
            if (datagrid == null) return;
            if ((bool)e.NewValue)
            {
                datagrid.Sorting += Datagrid_Sorting;
            }
            else
            {
                datagrid.Sorting -= Datagrid_Sorting;
            }
        }

        private static void Datagrid_Sorting(object sender, DataGridSortingEventArgs e)
        {
            var datagrid = sender as DataGrid;
            if (datagrid.ItemsSource == null) return;

            var listColView = (ListCollectionView)CollectionViewSource.GetDefaultView(datagrid.ItemsSource);
            if (listColView == null) return;

            if (e.Column.SortDirection == ListSortDirection.Descending)
            {
                //ソートを中断
                e.Handled = true;
                //ソートの方向をクリア
                e.Column.SortDirection = null;
                datagrid.Items.SortDescriptions.Clear();
            }
        }
    }
}
上記の添付プロパティを、下記のような形で使用します。
<Window …
        xmlns:atpr="clr-namespace:DataGridSort"
…
>
…
    <Grid>
        <DataGrid … atpr:Attached.IsSortCustomize="True"/>
    </Grid>
</Window>
上記の実装を行い実行し、

列ヘッダーをクリックすると、

昇順ソート、
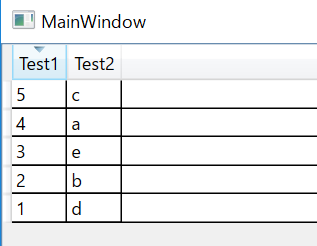
降順ソート、

ソート無し、の順に遷移し、もう一度クリックすると昇順ソートを行います。
Xamarin:PCLStorageを用いたファイル操作
Xamarinでローカルストレージのファイル操作が出来るライブラリ「PCL Storage」を扱ってみたのでメモしておきます。
まずNugetでpclstorageなどの文言で検索し、「PCL Storage」をダウンロードして使います。

下記のようなコードでファイル操作が出来ました。
using PCLStorage;
…

//ローカルストレージの位置を取得
var localstrage = FileSystem.Current.LocalStorage;
//フォルダチェック
var folderresult = await localstrage.CheckExistsAsync("DataFolder");
if (folderresult != PCLStorage.ExistenceCheckResult.FolderExists)
{
    //フォルダが見つからない場合の処理をここに記載
}
//フォルダが無ければ作成して移動、フォルダがあれば移動
var filefolder = await localstrage.CreateFolderAsync("DataFolder", CreationCollisionOption.OpenIfExists);
//ファイルチェック
var fileresult = await filefolder.CheckExistsAsync("Data.txt");
if (fileresult != PCLStorage.ExistenceCheckResult.FileExists)
{
    //ファイルが無ければ作成
    var savefile = await filefolder.CreateFileAsync("Data.txt", CreationCollisionOption.ReplaceExisting);
    await savefile.WriteAllTextAsync("filetext…filetext");
}
//ファイル読み込み
var loadfile = await filefolder.GetFileAsync("Data.txt");
var loadText = await loadfile.ReadAllTextAsync();
Xamarin:Xamarinで添付プロパティ(Attached Property)を試す
WPFではViewのコントロールに独自の値を渡したり、独自の値の変更を契機にイベントを動かしたい時などに添付プロパティを使っていました。 Xamarinでも使えるようなので、とりあえずシンプルな実装を試してみました。
添付プロパティの実装は以下の通り。
public class Attached
{
    public static readonly BindableProperty TestProperty =
    BindableProperty.CreateAttached("Test", typeof(bool), typeof(Attached), false, propertyChanging: OnTestChanged);

    private static void OnTestChanged(BindableObject bindable, object oldValue, object newValue)
    {
        var editor = bindable as Editor;
        if ((bool)newValue)
        {
            //フォーカスが離れた際にイベント実行
            editor.Unfocused += Editor_Unfocused; ;
        }
        else
        {
            editor.Unfocused -= Editor_Unfocused;
        }
    }

    private static void Editor_Unfocused(object sender, FocusEventArgs e)
    {
        var editor = sender as Editor;
        //テキストを赤に。
        editor.TextColor = Color.Red;
    }
}
添付プロパティの適用個所は以下のような感じで。
<?xml version="1.0" encoding="utf-8" ?>
<ContentPage xmlns="http://xamarin.com/schemas/2014/forms"
             xmlns:x="http://schemas.microsoft.com/winfx/2009/xaml"
             x:Class="AttachedApp.MainPage"
             xmlns:local="clr-namespace:AttachedApp">
  <Editor local:Attached.Test="True" Text="TestEditor" VerticalOptions="Center" HorizontalOptions="Center" />
</ContentPage>
UWPでの動作イメージはこんな感じです。
・起動時

・テキストボックスからフォーカスが外れた時
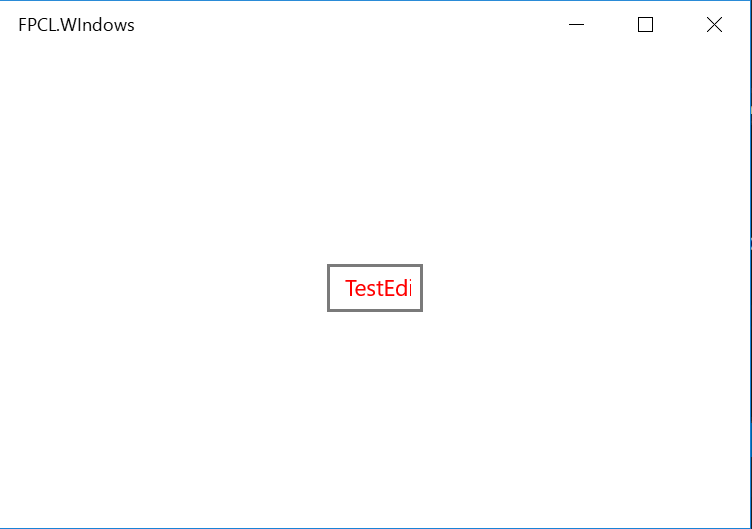
この例ですと、Editorにフォーカスが移ると文字が青くなるだけの簡素な内容ですが、 ViewModelからコマンドを渡してあげたりイベントで使いたい値を渡してあげたり、幅広い用途が考えられそうです。
Xamarin:Gridアイテムの間を詰める
例えばこんな感じのxamlを書いた場合、
 <Grid>
    <Grid.RowDefinitions>
      <RowDefinition />
      <RowDefinition />
    </Grid.RowDefinitions>
    <Grid.ColumnDefinitions>
      <ColumnDefinition />
      <ColumnDefinition />
    </Grid.ColumnDefinitions>
    <Button Text="test" VerticalOptions="Fill" HorizontalOptions="Fill" />
    <Button Grid.Row="1" Text="test" VerticalOptions="Fill" HorizontalOptions="Fill" />
    <Button Grid.Column="1" Text="test" VerticalOptions="Fill" HorizontalOptions="Fill" />
    <Button Grid.Column="1" Grid.Row="1"  Text="test" VerticalOptions="Fill" HorizontalOptions="Fill" />
  </Grid>
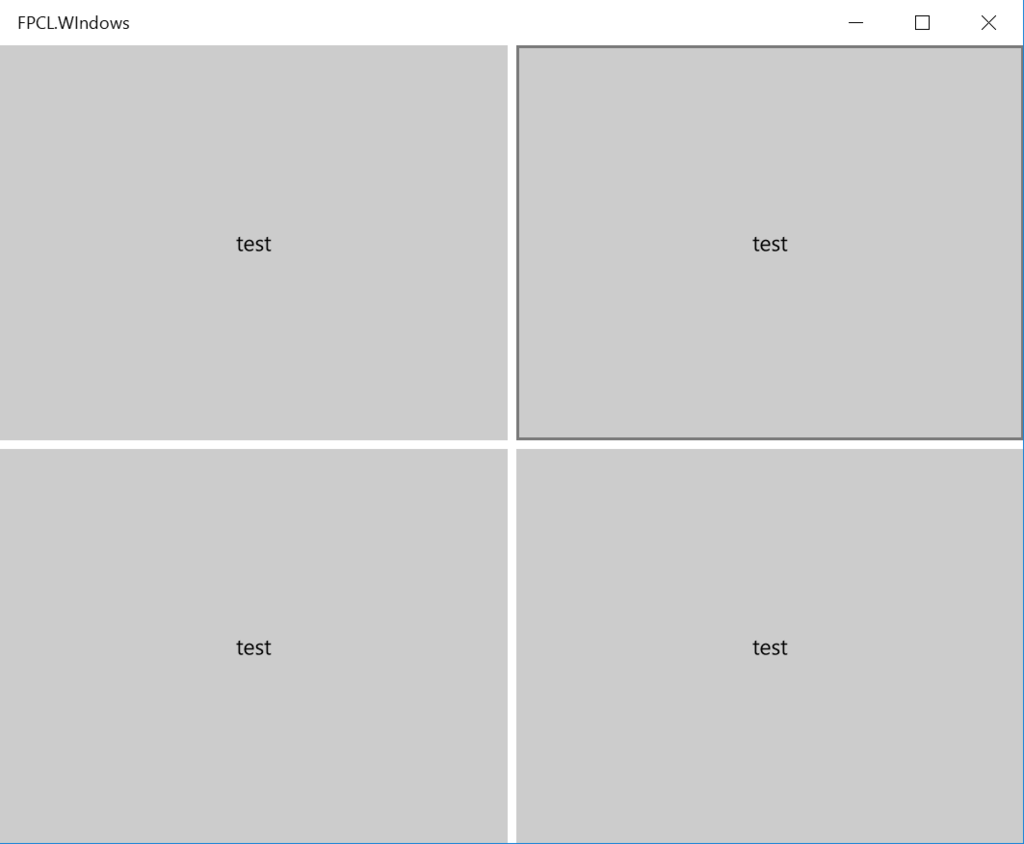
こんな感じでグリッド内アイテムの間に隙間が出来ます。
GridのRowSpacingプロパティとColumnSpacingプロパティのデフォルト値が0でないことが原因のようです。
そこで
<Grid RowSpacing="0">
と設定すると、

行間の隙間が埋まります。
更に
<Grid RowSpacing="0" ColumnSpacing="0">
と設定すると、

列の隙間も埋まります。